Automated Syringe Pump
About My Syringe Pump
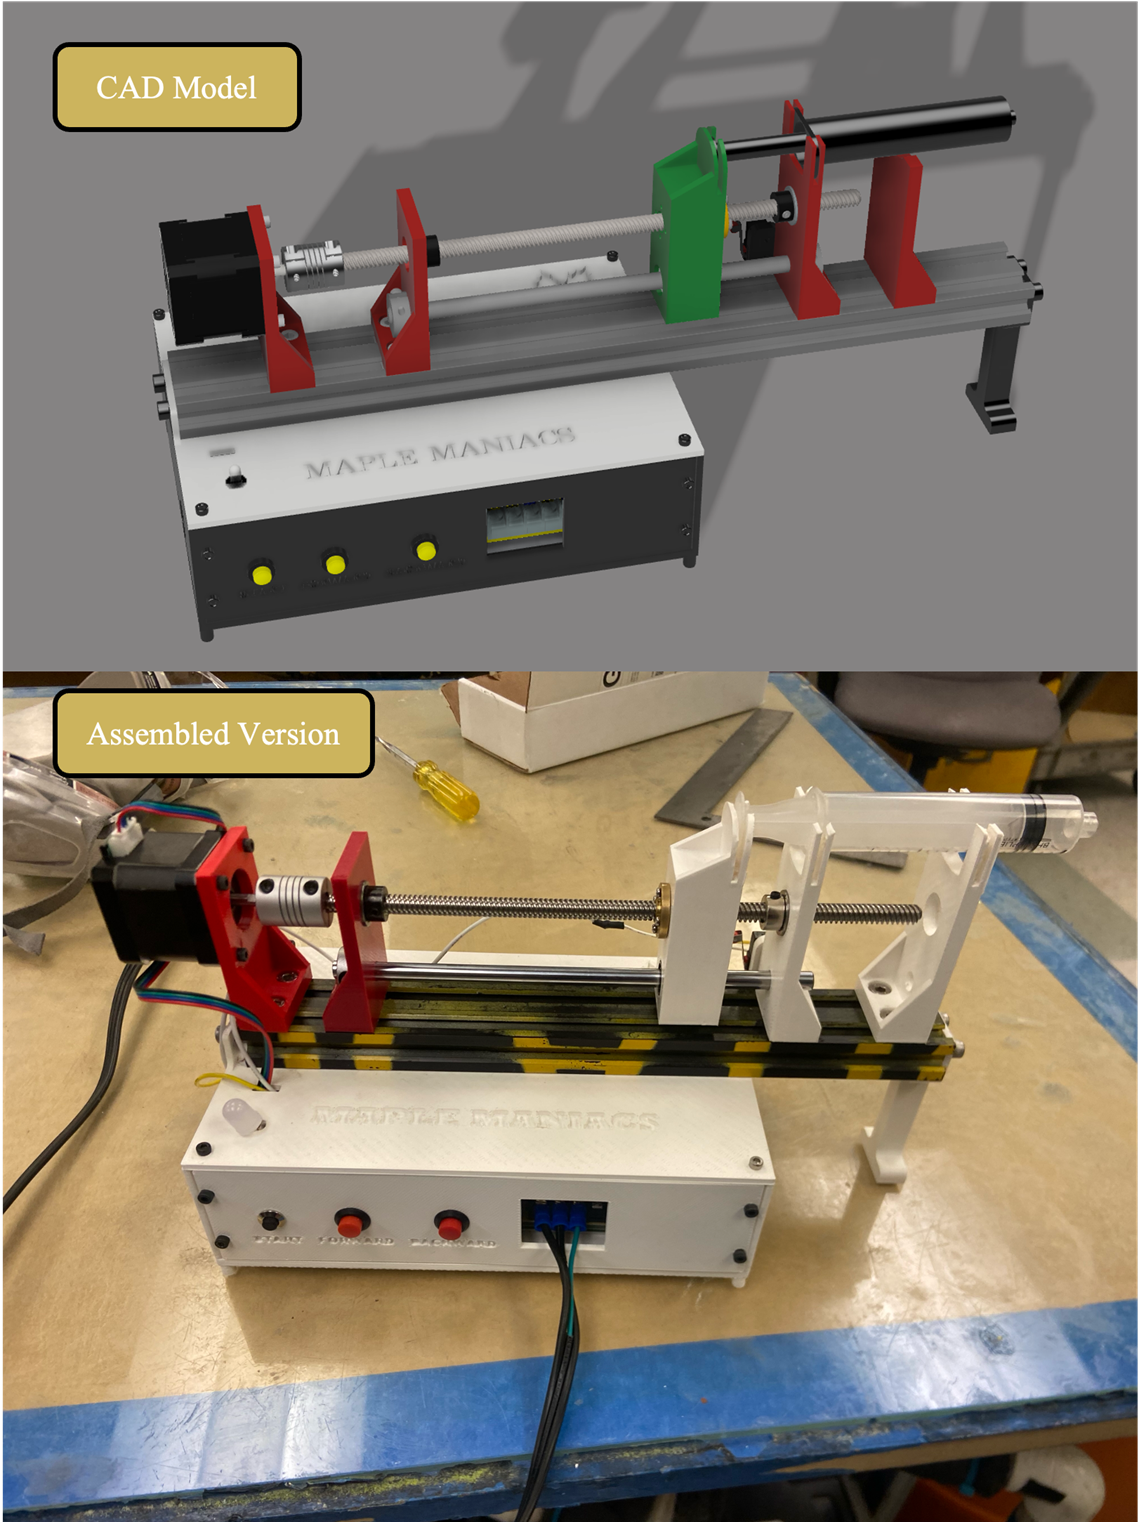
Commercial syringe pumps are widely used in clinical and laboratory settings, but their high cost can limit accessibility despite relying on relatively simple mechanical and electrical principles. For this project, I set out to design and fabricate a low-cost, programmable syringe pump using additive manufacturing and embedded control. The goal was to create a device capable of delivering precise, non-pulsatile flow while remaining adaptable to different syringe sizes and easy to modify. By combining CAD design, FFF 3D printing, stepper motor driven linear actuation, and Arduino-based control, I developed a fully functional pump compatible with both 10 mL and 20 mL syringes. The final design integrates user controls and visual status feedback.
Key Features
- Compatibility with 10 mL and 20 mL syringes
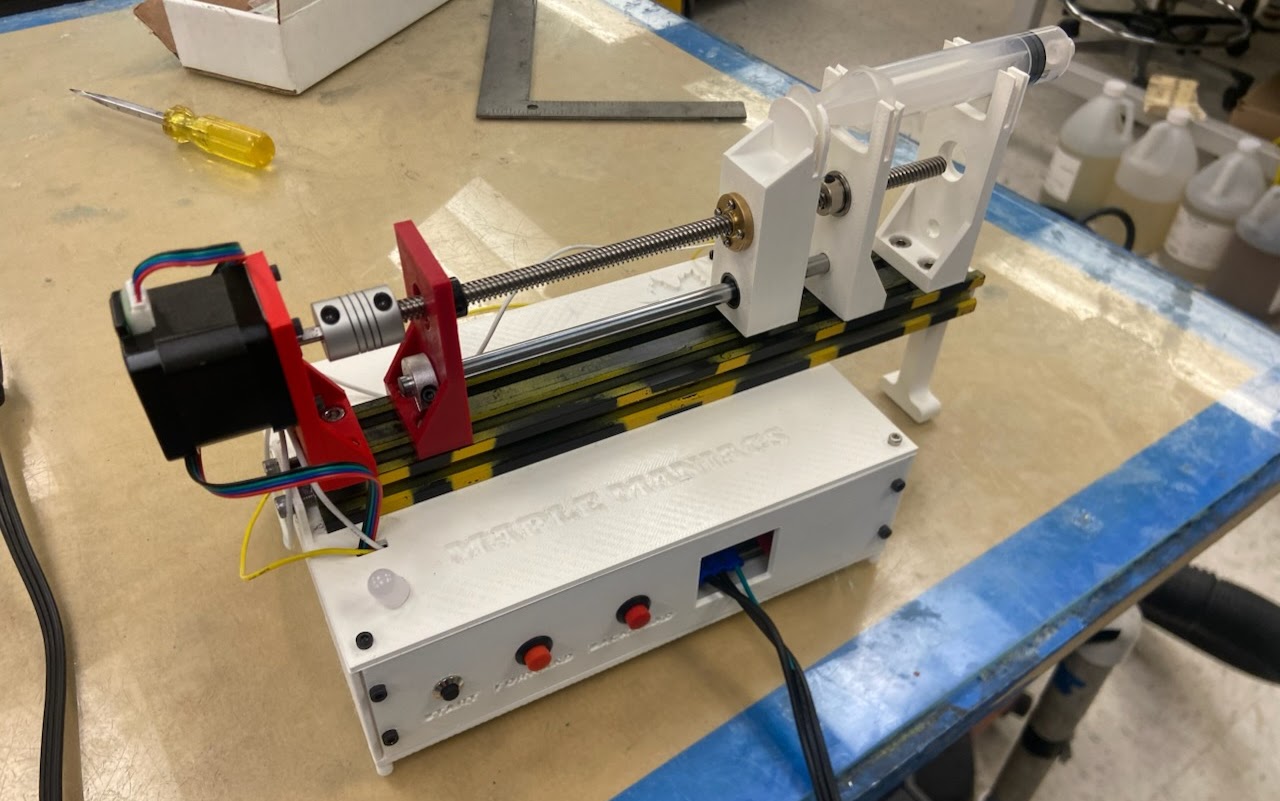
- Stepper motor driven lead screw for smooth, precise actuation
- Adjustable limit switch to prevent excess compression/decompression
- Start/pause control with visual status feedback (RGB LED)
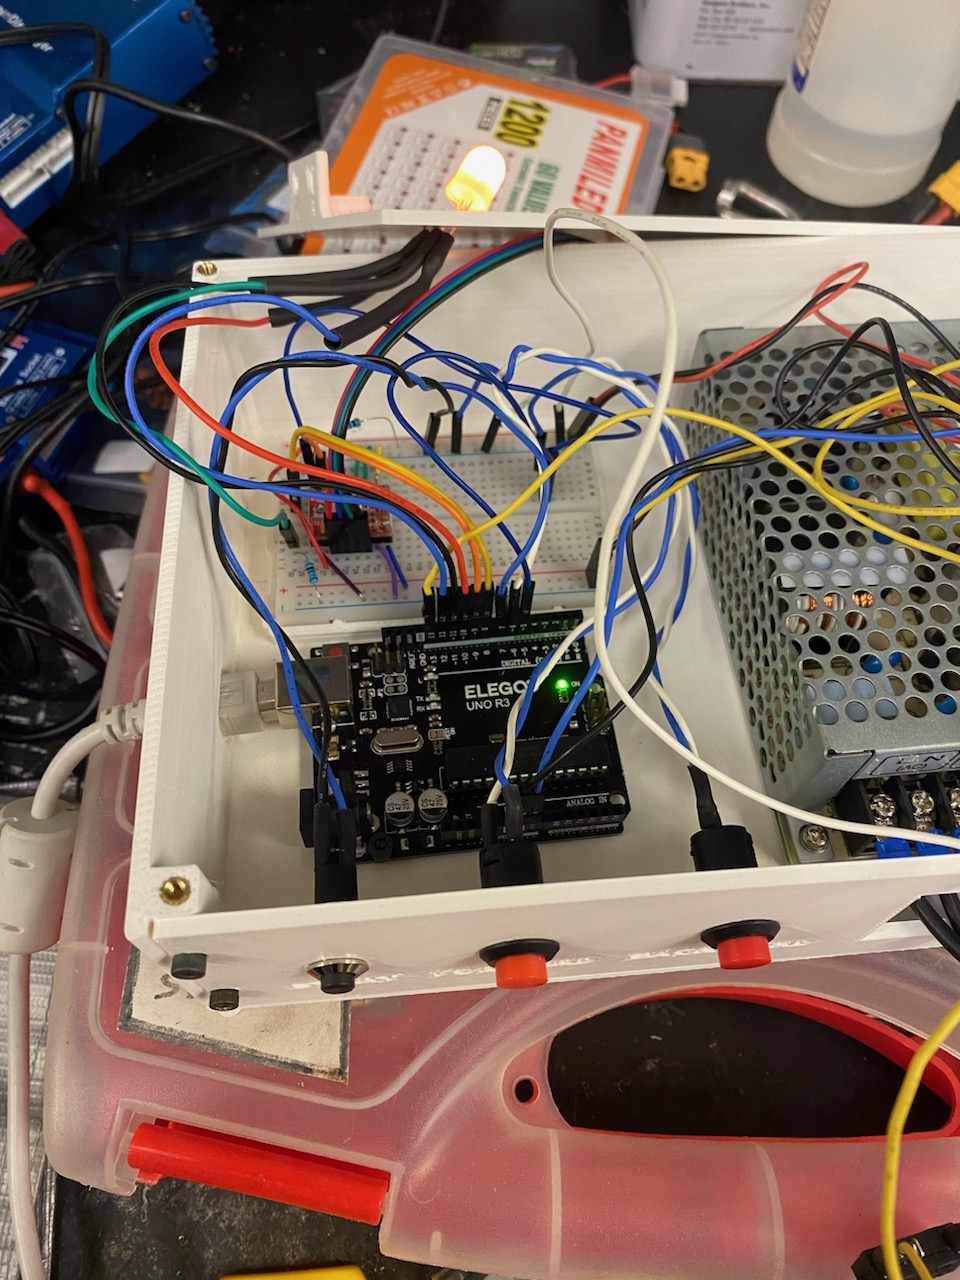
- Enclosed electronics designed to protect against liquid exposure
- Fully 3D printed structural components with no adhesive bonding
Off-the-Shelf Components
| Component | Description |
|---|---|
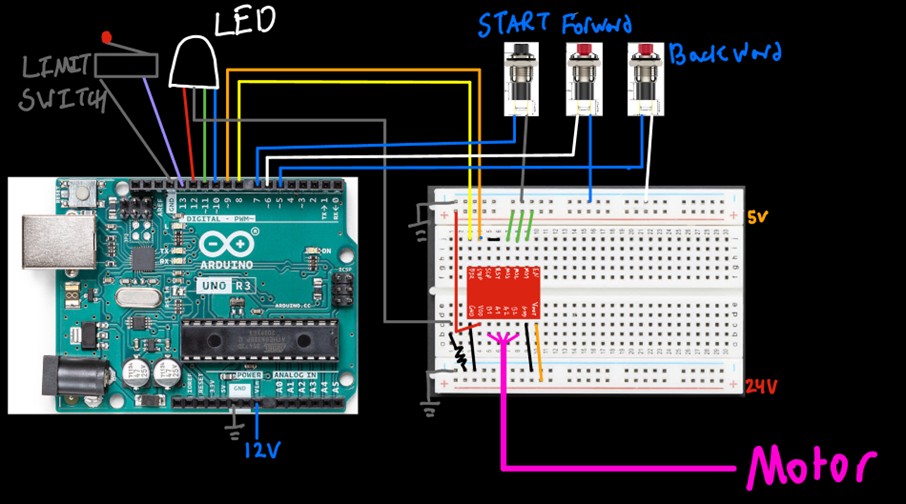
| Arduino Uno | Microcontroller for motor control and user interface |
| NEMA-17 Stepper Motor | Drives linear motion through lead screw |
| Stepper Motor Driver | Controls microstepping and motor current |
| Lead Screw & Brass Nut | Converts rotational motion to linear motion |
| LM8UU Linear Bearings | Guides carriage along linear rods |
| Aluminum Extrusion | Structural rail for motion system |
| Limit Switch | Detects end of syringe travel |
| Latching Pushbutton | Start / pause control |
| RGB LED | System status indicator (run / pause / empty) |
| External Power Supply | Provides power to motor and electronics |
3D Printed Components
| Part | Material | Function |
|---|---|---|
| Syringe Holder | PLA | Secures 10 mL and 20 mL syringe barrels |
| Plunger Carriage | PLA | Transfers linear force to syringe plunger |
| Electronics Housing | PLA | Protects wiring and control electronics |
| Rail Supports | PLA | Stabilize linear motion system |
| Motor Mount | ABS | Heat-resistant mount for stepper motor |
Operating Instructions
- Ensure all components are dry and disconnected from power.
- Upload the Arduino code with the correct syringe size and flow rate.
- Disconnect the USB cable and connect the external power supply.
- Adjust the limit switch position for the selected syringe size.
- Use the forward and backward controls to position the syringe holder.
- Secure the filled syringe in the holder.
- Press the Start button to begin pumping.
RGB LED Status Indicators:
- Green: Running
- Yellow: Paused
- Red: Syringe empty / limit reached
Interactive CAD Model
Arduino Code
The Arduino script converts a user-defined volumetric flow rate into a motor step rate using syringe diameter, lead screw pitch, and microstepping configuration. Global variables allow easy adjustment for syringe size and desired flow rate.